
Installing MongoDB Ubuntu14.04 and Specific Version of MongoDB

Installing MongoDB in Ubuntu
Refer: http://docs.mongodb.org/manual/tutorial/install-mongodb-on-ubuntu/

Import Public Key
$ sudo apt-key adv --keyserver hkp://keyserver.ubuntu.com:80 --recv 7F0CEB10

Create a list file for MongoDB
$ echo "deb http://repo.mongodb.org/apt/ubuntu "$(lsb_release -sc)"/mongodb-org/3.0 multiverse" | sudo tee /etc/apt/sources.list.d/mongodb-org-3.0.list

### NOTE !!! We need this repository for 2.6.3 installation ###

$ echo 'deb http://downloads-distro.mongodb.org/repo/ubuntu-upstart dist 10gen' | sudo tee /etc/apt/sources.list.d/10gen.list

Reload local package database
$ sudo apt-get update

Install MongoDB packages

Either latest - STOP - Do you want latest?
$ sudo apt-get install -y mongodb-org

or Specific version
$ sudo apt-get install -y mongodb-org=2.6.3 mongodb-org-server=2.6.3 mongodb-org-shell=2.6.3 mongodb-org-mongos=2.6.3 mongodb-org-tools=2.6.3

Pin a specific version of MongoDB.

Although you can specify any available version of MongoDB, apt-get will upgrade the packages when a newer version becomes available. To prevent unintended upgrades, pin the package. To pin the version of MongoDB at the currently installed version, issue the following command sequence:

$ echo "mongodb-org hold" | sudo dpkg --set-selections
$ echo "mongodb-org-server hold" | sudo dpkg --set-selections
$ echo "mongodb-org-shell hold" | sudo dpkg --set-selections
$ echo "mongodb-org-mongos hold" | sudo dpkg --set-selections
$ echo "mongodb-org-tools hold" | sudo dpkg --set-selections

Versions of the MongoDB packages before 2.6 use a different repo location. Refer to the version of the documentation appropriate for your MongoDB version.

Run MongoDB

The MongoDB instance stores its data files in /var/lib/mongodb and its log files in /var/log/mongodb by default, and runs using the mongodb user account. You can specify alternate log and data file directories in /etc/mongod.conf. See systemLog.path and storage.dbPath for additional information.

If you change the user that runs the MongoDB process, you must modify the access control rights to the /var/lib/mongodb and /var/log/mongodb directories to give this user access to these directories

Start MongoDB.

Issue the following command to start mongod:
$ sudo service mongod start

Verify that the mongod process has started successfully by checking the contents of the log file at /var/log/mongodb/mongod.log for a line reading
[initandlisten] waiting for connections on port <port>
where <port> is the port configured in /etc/mongod.conf, 27017 by default.

$ sudo service mongod status

Stop MongoDB.
As needed, you can stop the mongod process by issuing the following command:
sudo service mongod stop

Restart MongoDB.

Issue the following command to restart mongod:
$ sudo service mongod restart

Keeping it from auto-starting:
Refer: http://edgar.tumblr.com/post/3242138398/disable-start-of-a-service-on-boot-in-ubuntu
/etc/init/mongod.conf
ENABLE_MONGOD="yes" -> "no"

Using RoboMongo

Name: localhost
Address: localhost:27017

Removing MongoDB

Refer: http://askubuntu.com/questions/497139/how-to-completely-uninstall-mongodb-2-6-3-from-ubuntu-13-04

$ sudo dpkg -l | grep mongo

That should output a list of packages with mongo in the name.

If there are still files left on the system following an apt-get remove mongo, try and run the command again with the --purge switch, using a wildcard search for the name:

Such as, but review the above command, you will probably need to customize this:
$ sudo apt-get remove mongodb* --purge

Real Example on Ubuntu 14.04
$ sudo apt-get remove mongodb-org mongodb-org-mongos mongodb-org-server mongodb-org-shell mongodb-org-tools --purge
 

Install PAC SSH Manager in Ubuntu

Official Download: http://sourceforge.net/projects/pacmanager/ Refer: http://linuxg.net/how-to-install-pac-manager-4-5-2-on-ubuntu-linux-mint-and-debian/ PAC Manager is a GUI for SSH and telnet, similar to Putty.

Issues after upgrade from Ubuntu 14.04 to Ubuntu 16.04.  Needed to run the following commands, you need to remove and re-install PAC.

$ sudo apt-get remove pac
$ sudo rm -rf /opt/pac
$ sudo dpkg -i pac-4.5.5.7-all.deb

This did NOT work:

$ find /opt/pac/ -name "Vte.so*" -exec rm {} +
Refer:  https://sourceforge.net/p/pacmanager/bugs/177/


How install Minecraft on Ubuntu 14.04

Refer: http://www.howtogeek.com/198476/how-to-install-minecraft-on-ubuntu-or-any-other-linux-distribution/

The most important part was installing the Nvidia drivers, and then Oracle Java 7+.  Download the Jar file, make it executable through file menu, and just double clicking the icon.  Also, reduced the frame rate, etc. for other items to make it a bit more performant.

Remove nvidia splash screen

After installing the the nvidia graphic drivers for Ubuntu 14.04, an Nvidia splash would keep appearing during logon.

One command to disable Nvidia logo
Refer: http://ubuntuhandbook.org/index.php/2013/08/remove-nvidia-logo-from-ubuntu-startup-screen/

The easiest way to do this is running below command in terminal (press Ctrl+Alt+T):
$ sudo nvidia-xconfig --no-logo

Lexmark Prevail Pro 705 Install with Ubuntu

This driver works with Ubuntu 14.04 64-bit
Works-Ubuntu-14-lexmark-inkjet-legacy-wJRE-1.0-1.amd64.deb.sh_Pro900.tar.gz

Extract it in your downloads folder, and it's a single *.sh
$ sudo su -

And execute the script and follow the prompts.
Refer: http://support.lexmark.com/index?docLocale=en_US&page=content&id=DR20854&locale=EN&userlocale=EN

Actual filename: lexmark-inkjet-legacy-wJRE-1.0-1.amd64.deb.sh_Pro900.tar.gz

If you get this error you will need to uninstall a previous version of the Lexmark drives

The installer has detected previously installed component. -- lexmark-inkjet-legacy Please remove the installed component and run the installer again.

sudo apt-get --purge remove lexmark-inkjet-legacy
sudo apt-get --purge remove lexmark-wsu-legacy

Older Notes or 32-bit version of Ubuntu - Kept for reference

Refer: lexmark.com

Printer driver (with JRE) for 32-bit Linux distributions with Debian-based packaging
File Name: lexmark-inkjet-legacy-wJRE-1.0-1.i386.deb.sh.tar.gz
Released 10/25/2011
Version: 1.0.1
File Size 4.9859946E7
Release Notes

This package installs a printer driver for 32-bit Linux distributions with Debian-based packaging. The following components will be installed on your system along with the printer driver:

Lexmark Printer Toolbox - allows users to perform maintenance operations on the device and check ink levels of the cartridges

Wireless Setup Utility - allows users to configure the wireless settings for wireless capable printers

This package is installed with Java Runtime Environment (JRE), used for running Java applications.

INSTALLATION INSTRUCTIONS

IMPORTANT: Follow these steps only if your printer is listed in the Linux Home Office and SMB Products compatibility page.

A. RUNNING THE GUI INSTALLER SCRIPT FROM THE TERMINAL

Open up your favorite terminal (xterm, konsole, gnome-terminal, etc)

Extract the zip file
Use the following command to install the driver
DEB-based distros:

# ./lexmark-inkjet-[xx]-driver-[x.x.x]..i386.deb.sh
Follow the instruction in the installation screen.

B. RUNNING THE GUI INSTALLER SCRIPT
Do not attach the printer via USB to the Linux machine.
Extract the zip file.
For DEB-based systems: lexmark-inkjet-[xx]-driver-[x.x.x].i386.deb.sh

Run the installer script file by double-clicking on the file icon and then click the ""Run in Terminal"" button or run the script file via command-line.

Follow the instructions in the installer screen.

Remove guest account from Ubuntu

Just press Ctrl+Alt+T on your keyboard to open Terminal. When it opens, run the command(s) below:

sudo nano /usr/share/lightdm/lightdm.conf.d/50-ubuntu.conf

Add the following line, save and close.

allow-guest=false

Reboot, and you're set.

Printer: Brother HL-2170W

Installing Brother HL-2170W LaserJet on Ubuntu 14.02 and 18.04

Refer: https://support.brother.com/g/b/downloadtop.aspx?c=us&lang=en&prod=hl2170w_all

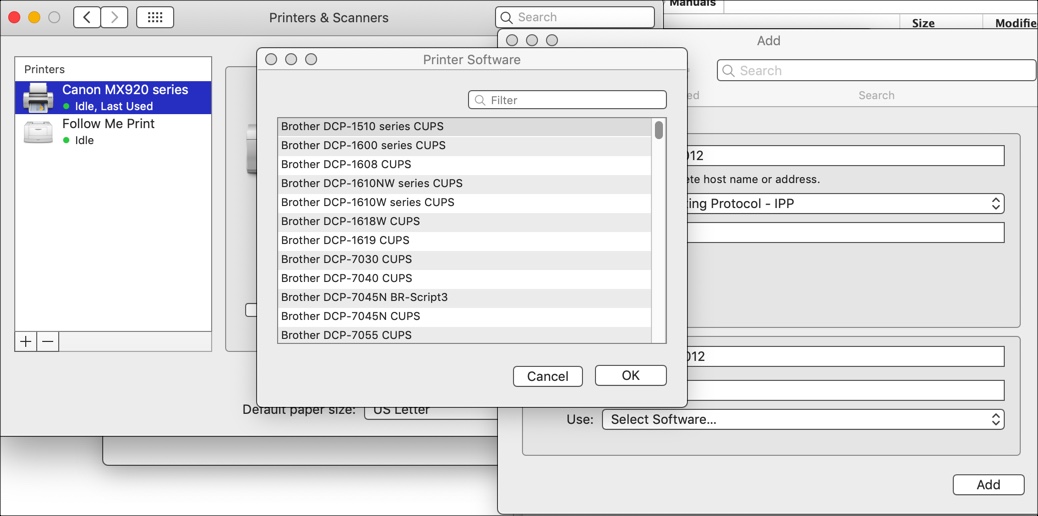
Mac Setup, Get Binary from Site

IP address for installation is: 192.168.000.012
Web Interface is: http://192.168.0.12/printer/main.html

Brother has web portal at http://192.168.0.12 (admin / access)

The Brother site does has some installation instructions but it's for 32-bit software had to mess around with it, but the drivers seem to work, maybe?  Still used the Printer wizard.

Here's the installation instructions and *.gz file:
linux-brprinter-installer-2.2.zip

Using the wizard from the command line is the best way to install.  Choose option to install with IP address, when finishing and testing the installation.

Make sure you run the installation as sudo and also choose at the end "Will you specify the Device URI? [Y/n] ->y" with option 12 to specify the IP address of the printer as 192.168.0.12

AppSocket/HP JetDirect
Host: 192.168.86.35 (T-Mobile)
Host: 192.168.0.12 (XFinity)
Click Forward
Click Apply

Older Notes

Use PPD to install: brother-hl-2170w-PPD